> ## Documentation Index
> Fetch the complete documentation index at: https://docs.memorylake.ai/llms.txt
> Use this file to discover all available pages before exploring further.
# AI Application Integrations
> Connect Model Router to existing AI development tools like Claude Code and Codex CLI
## What are AI Application Integrations?
Instead of writing code yourself, you can connect Model Router to existing AI development tools. These tools provide user-friendly interfaces for AI-assisted coding and development.
Before configuring these tools, make sure you have:
1. Created an API key (see [Create API Key](/features/model-router/getting-started/create-api-key))
2. Checked which models are available (see [List Available Models](/features/model-router/list-available-models))
## Supported Applications
### Claude Code
Claude Code is a code editor integration tool based on Anthropic Claude. It provides AI-powered coding assistance directly in your terminal.
### Codex CLI
Codex CLI is a command-line interface AI code assistant tool that helps you write and understand code.
### Cherry Studio
Cherry Studio is a powerful desktop AI client with multi-model conversation and drawing capabilities. It integrates 30+ industry-specific intelligent assistants.
* **Official Website**: [https://cherry-ai.com/](https://cherry-ai.com/)
* **Download**: [https://cherry-ai.com/download](https://cherry-ai.com/download)
* **Official Documentation**: [https://docs.cherry-ai.com](https://docs.cherry-ai.com)
## Claude Code Integration
### What You Need
* **ANTHROPIC\_AUTH\_TOKEN**: Your API key from [Memorylake Console](https://app.memorylake.ai/panel/token) (starts with `sk-`)
* **ANTHROPIC\_BASE\_URL**: Model Router service address: `https://app.memorylake.ai/claude`
### Step 1: Install Claude Code
Install Claude Code globally via npm:
```bash theme={null}
npm install -g @anthropic-ai/claude-code
```
Verify installation:
```bash theme={null}
claude --version
```
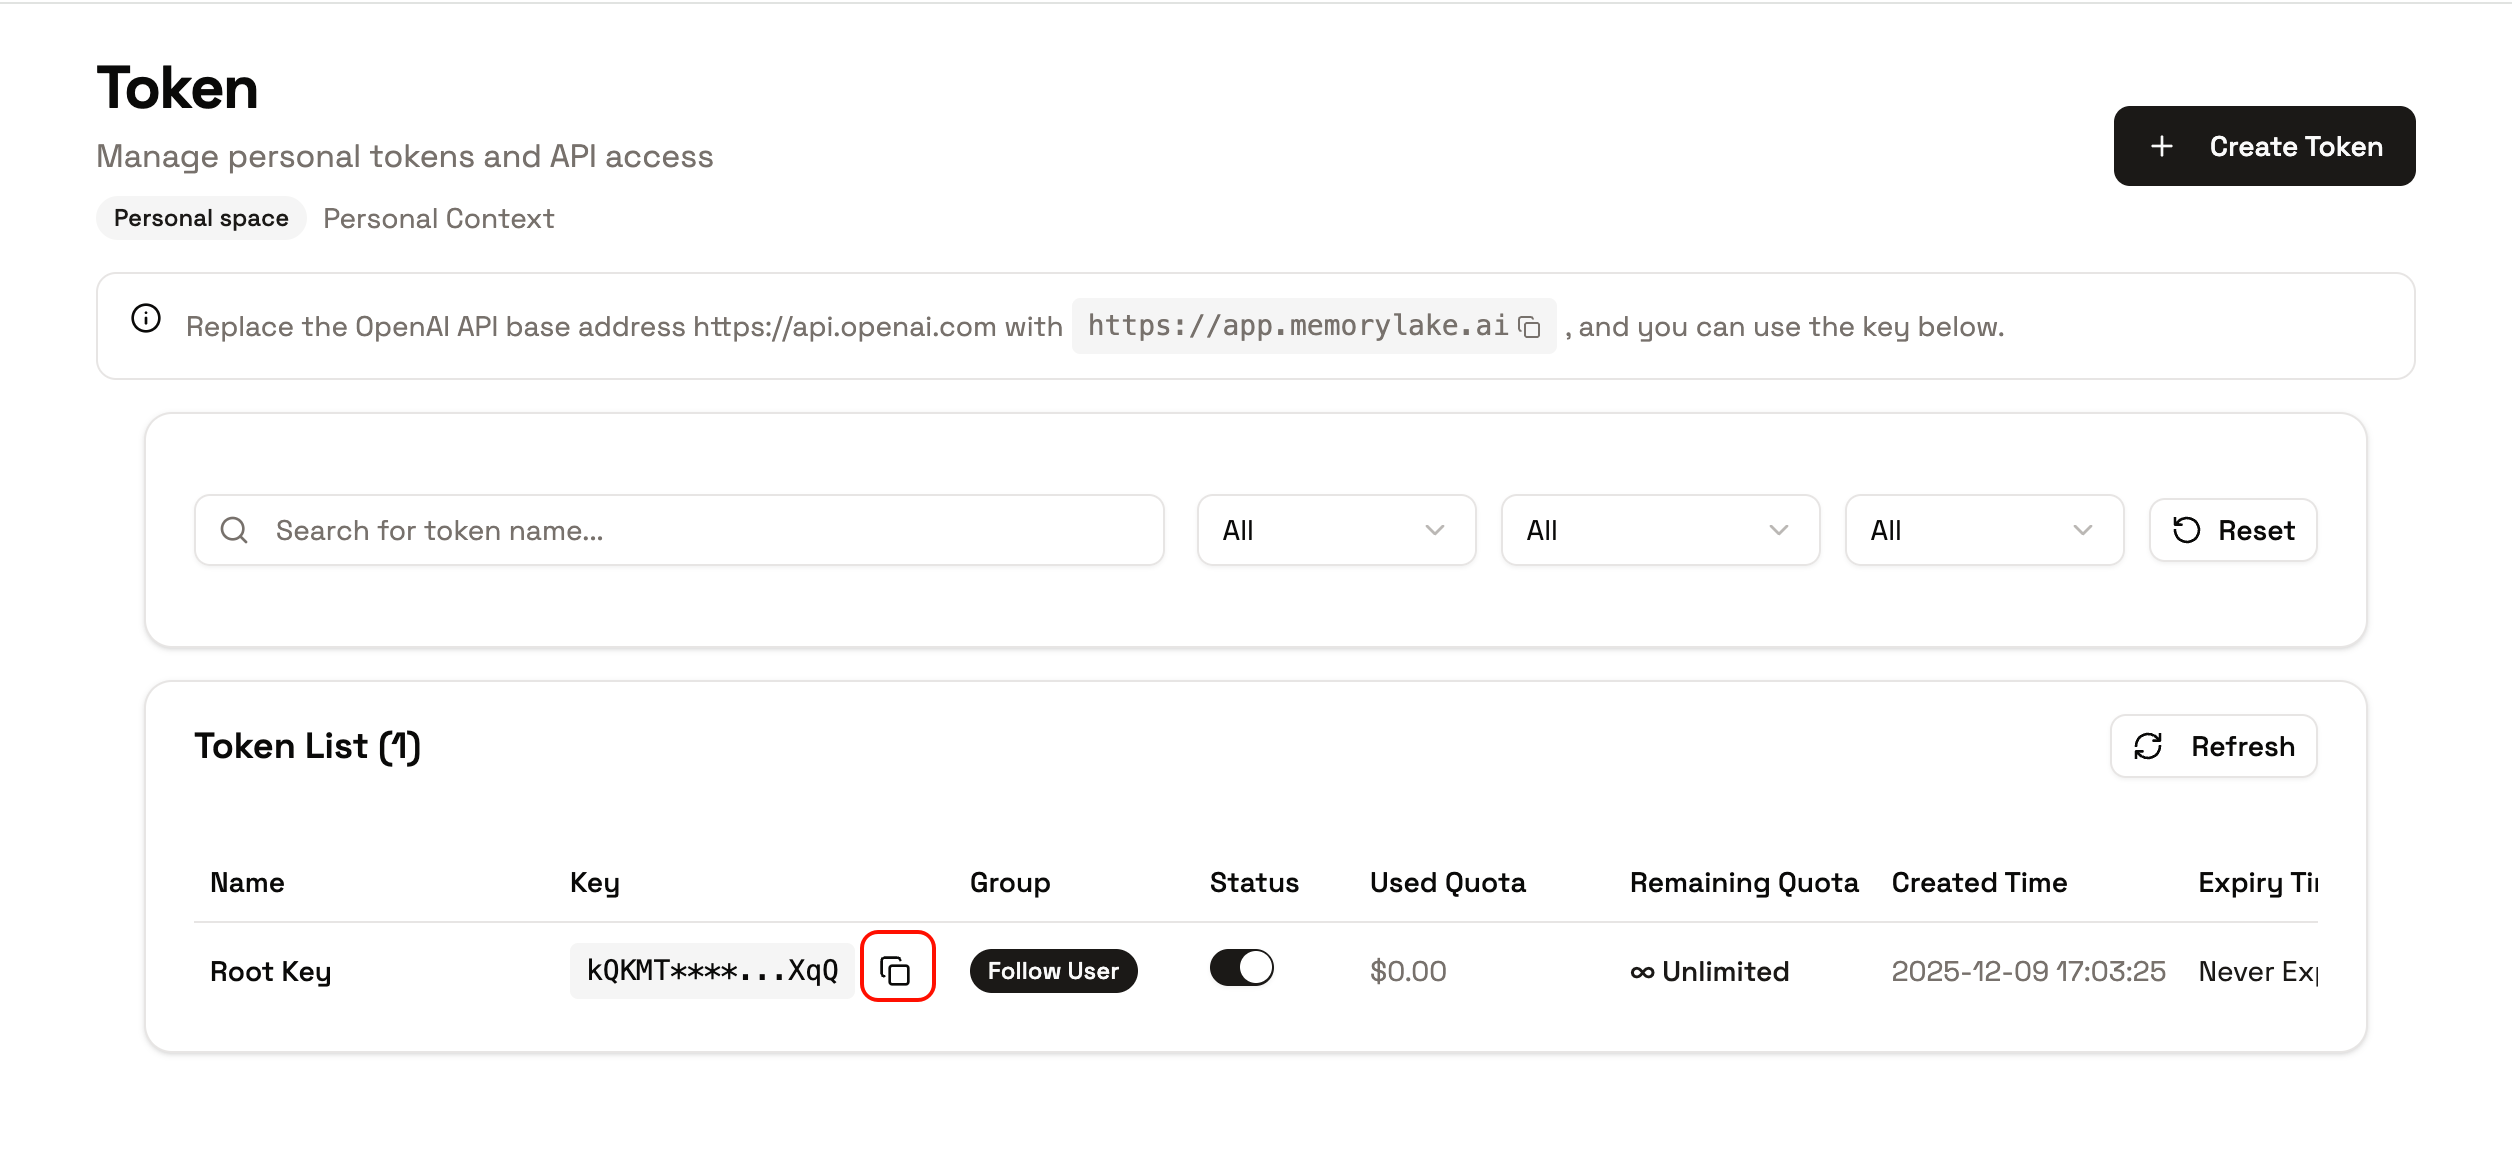
### Step 2: Get Your API Key
Click "Add API Key" on the [API key management page](https://app.memorylake.ai/panel/token) in the Memorylake Console to get an API Key.
The name can be set arbitrarily. It's recommended to set the quota to unlimited. Keep other settings as default.
 ### Step 3: Configure Environment Variables
Set environment variables in your project directory:
```bash theme={null}
cd your-project-folder
export ANTHROPIC_AUTH_TOKEN=sk-...
export ANTHROPIC_BASE_URL=https://app.memorylake.ai/claude
claude
```
### Step 4: Initialize Configuration
After running, complete initialization as prompted:
1. Select your preferred theme + Enter
2. Confirm safety notice + Enter
3. Use default Terminal configuration + Enter
4. Trust working directory + Enter
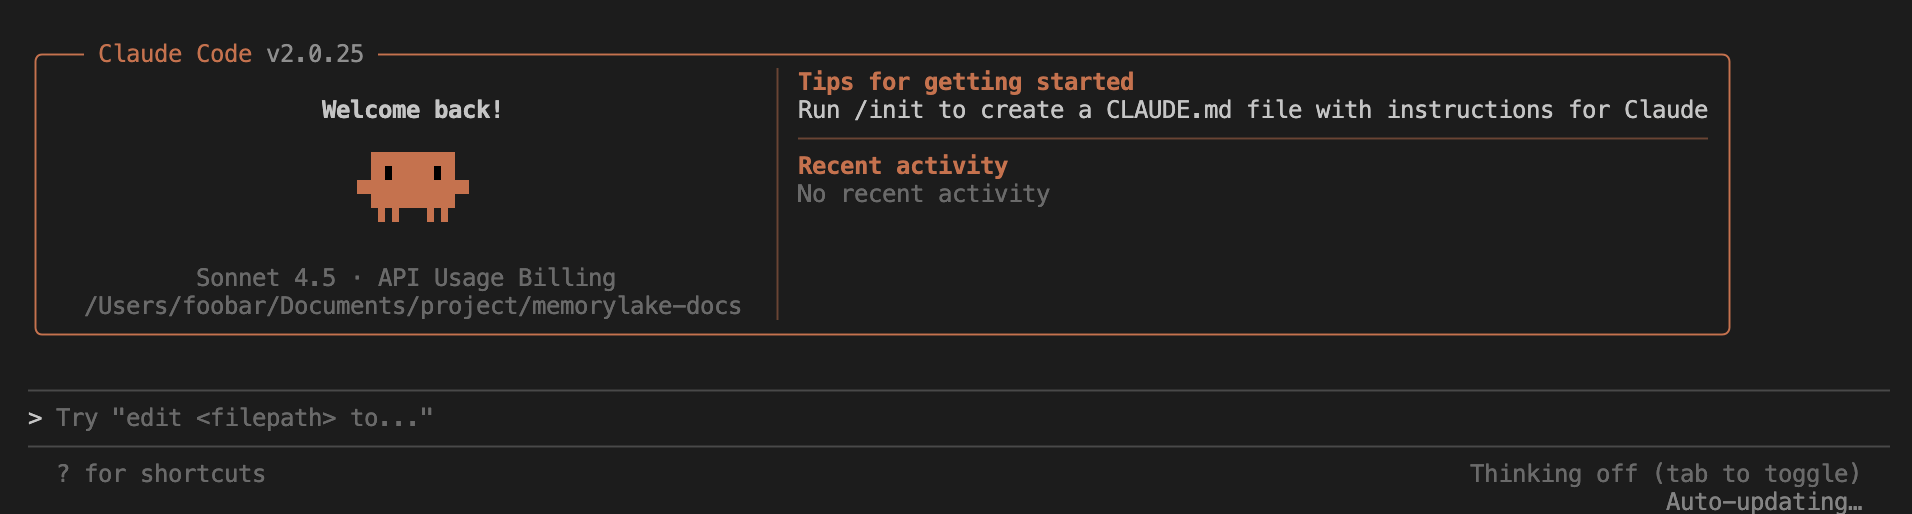
### Step 5: Start Using
After configuration, you can code with your AI programming partner in the terminal.
### Step 3: Configure Environment Variables
Set environment variables in your project directory:
```bash theme={null}
cd your-project-folder
export ANTHROPIC_AUTH_TOKEN=sk-...
export ANTHROPIC_BASE_URL=https://app.memorylake.ai/claude
claude
```
### Step 4: Initialize Configuration
After running, complete initialization as prompted:
1. Select your preferred theme + Enter
2. Confirm safety notice + Enter
3. Use default Terminal configuration + Enter
4. Trust working directory + Enter
### Step 5: Start Using
After configuration, you can code with your AI programming partner in the terminal.
 ### Persistent Configuration (Recommended)
To avoid repeatedly entering environment variables each time, you can write the configuration to shell configuration files:
**Bash Configuration:**
```bash theme={null}
echo -e '\n export ANTHROPIC_AUTH_TOKEN=sk-...' >> ~/.bash_profile
echo -e '\n export ANTHROPIC_BASE_URL=https://app.memorylake.ai/claude' >> ~/.bash_profile
echo -e '\n export ANTHROPIC_AUTH_TOKEN=sk-...' >> ~/.bashrc
echo -e '\n export ANTHROPIC_BASE_URL=https://app.memorylake.ai/claude' >> ~/.bashrc
```
**Zsh Configuration:**
```bash theme={null}
echo -e '\n export ANTHROPIC_AUTH_TOKEN=sk-...' >> ~/.zshrc
echo -e '\n export ANTHROPIC_BASE_URL=https://app.memorylake.ai/claude' >> ~/.zshrc
```
After configuration, restart the terminal to use directly:
```bash theme={null}
cd your-project-folder
claude
```
## Codex CLI Integration
### What You Need
* **OPENAI\_API\_KEY**: Your API key from [Memorylake Console](https://app.memorylake.ai/panel/token) (starts with `sk-`)
* **base\_url**: Model Router service address: `https://app.memorylake.ai/v1`
* **model**: Model name to use (check [available models](/features/model-router/list-available-models))
### Step 1: Install Node.js
Ensure Node.js environment is installed. Codex CLI requires Node.js support.
### Step 2: Install Codex CLI
Install Codex CLI globally via npm:
```bash theme={null}
npm i -g @openai/codex
```
Verify installation:
```bash theme={null}
codex --version
```
### Step 3: Get Your API Key
Click "Add API Key" on the [API key management page](https://app.memorylake.ai/panel/token) in the Memorylake Console to get an API Key.
The name can be set arbitrarily. It's recommended to set the quota to unlimited. Keep other settings as default.
### Step 4: Create Configuration Files
Create `~/.codex/config.toml` file and add the following configuration:
```toml config.toml theme={null}
model = "gpt-5"
model_provider = "memorylake"
preferred_auth_method = "apikey"
[model_providers.memorylake]
name = "MemoryLake"
base_url = "https://app.memorylake.ai/v1"
wire_api = "responses"
```
Create `~/.codex/auth.json` file and add the following configuration:
```json auth.json theme={null}
{
"OPENAI_API_KEY": "Replace here with your KEY"
}
```
The configuration file path `~/.codex` can also be specified using the `CODEX_HOME` environment variable.
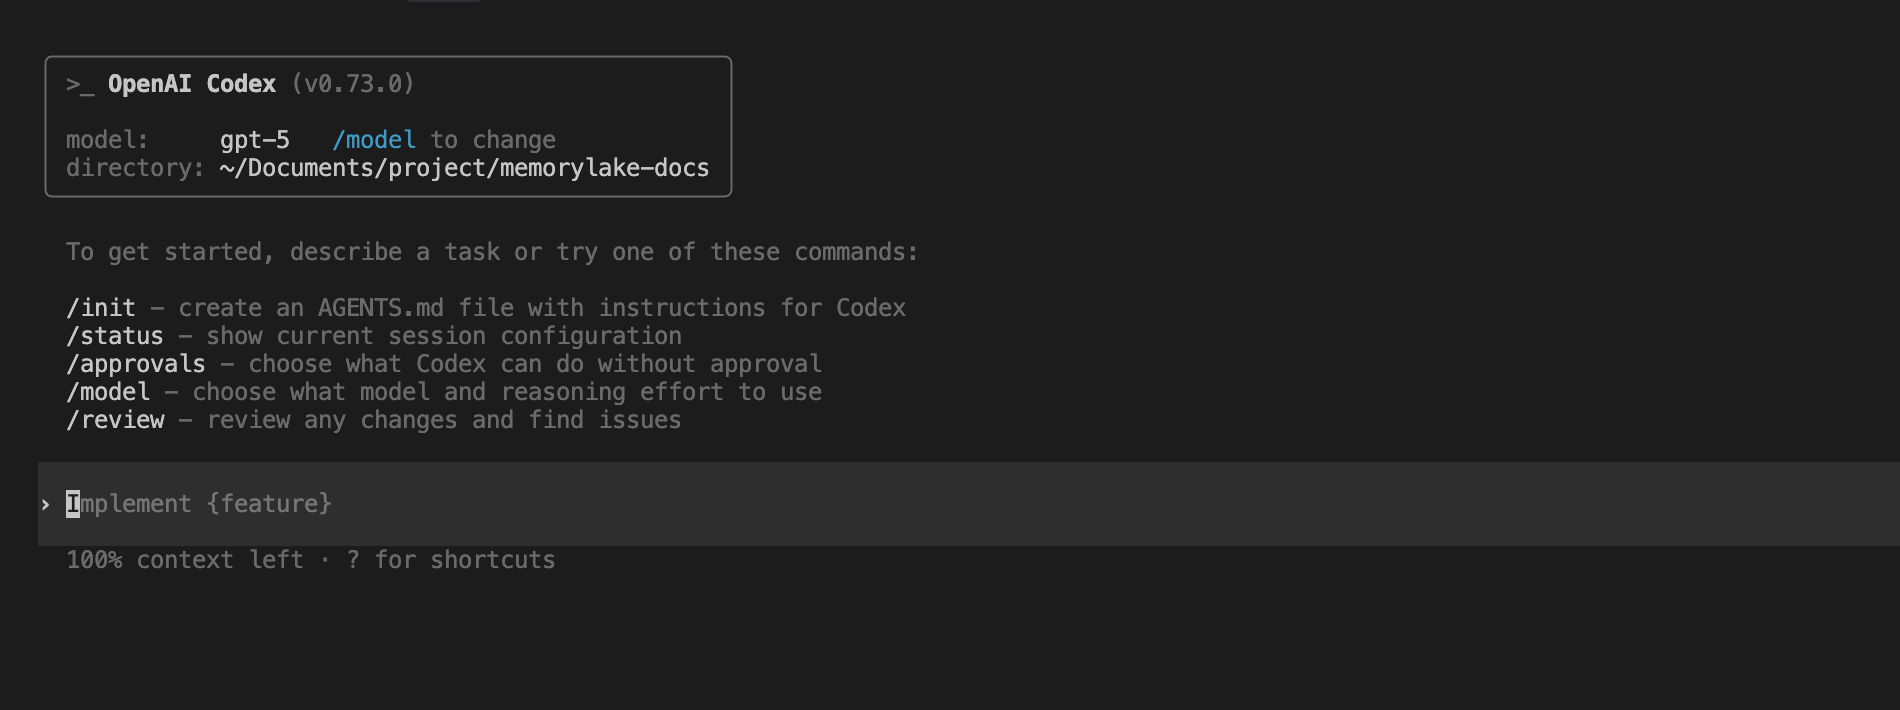
### Step 5: Start Using
Run in the project directory:
```bash theme={null}
cd your-project-folder
codex
```
### Persistent Configuration (Recommended)
To avoid repeatedly entering environment variables each time, you can write the configuration to shell configuration files:
**Bash Configuration:**
```bash theme={null}
echo -e '\n export ANTHROPIC_AUTH_TOKEN=sk-...' >> ~/.bash_profile
echo -e '\n export ANTHROPIC_BASE_URL=https://app.memorylake.ai/claude' >> ~/.bash_profile
echo -e '\n export ANTHROPIC_AUTH_TOKEN=sk-...' >> ~/.bashrc
echo -e '\n export ANTHROPIC_BASE_URL=https://app.memorylake.ai/claude' >> ~/.bashrc
```
**Zsh Configuration:**
```bash theme={null}
echo -e '\n export ANTHROPIC_AUTH_TOKEN=sk-...' >> ~/.zshrc
echo -e '\n export ANTHROPIC_BASE_URL=https://app.memorylake.ai/claude' >> ~/.zshrc
```
After configuration, restart the terminal to use directly:
```bash theme={null}
cd your-project-folder
claude
```
## Codex CLI Integration
### What You Need
* **OPENAI\_API\_KEY**: Your API key from [Memorylake Console](https://app.memorylake.ai/panel/token) (starts with `sk-`)
* **base\_url**: Model Router service address: `https://app.memorylake.ai/v1`
* **model**: Model name to use (check [available models](/features/model-router/list-available-models))
### Step 1: Install Node.js
Ensure Node.js environment is installed. Codex CLI requires Node.js support.
### Step 2: Install Codex CLI
Install Codex CLI globally via npm:
```bash theme={null}
npm i -g @openai/codex
```
Verify installation:
```bash theme={null}
codex --version
```
### Step 3: Get Your API Key
Click "Add API Key" on the [API key management page](https://app.memorylake.ai/panel/token) in the Memorylake Console to get an API Key.
The name can be set arbitrarily. It's recommended to set the quota to unlimited. Keep other settings as default.
### Step 4: Create Configuration Files
Create `~/.codex/config.toml` file and add the following configuration:
```toml config.toml theme={null}
model = "gpt-5"
model_provider = "memorylake"
preferred_auth_method = "apikey"
[model_providers.memorylake]
name = "MemoryLake"
base_url = "https://app.memorylake.ai/v1"
wire_api = "responses"
```
Create `~/.codex/auth.json` file and add the following configuration:
```json auth.json theme={null}
{
"OPENAI_API_KEY": "Replace here with your KEY"
}
```
The configuration file path `~/.codex` can also be specified using the `CODEX_HOME` environment variable.
### Step 5: Start Using
Run in the project directory:
```bash theme={null}
cd your-project-folder
codex
```
 ## Configuration File Details
### Codex CLI config.toml
* **model**: Specify the model name to use (must be available to your API key)
* **model\_provider**: Model provider identifier (use `memorylake` to represent Model Router)
* **preferred\_auth\_method**: Authentication method (use `apikey`)
* **base\_url**: Model Router API address, must include `/v1` path
### Codex CLI auth.json
* **OPENAI\_API\_KEY**: API Key obtained from the [Memorylake Console](https://app.memorylake.ai/panel/token)
### Custom Configuration Path
To use a custom configuration path, set the `CODEX_HOME` environment variable:
```bash theme={null}
export CODEX_HOME=/path/to/your/config
```
## Cherry Studio Integration
### What You Need
* **Provider Type**: Select a type supported by Model Router
* **API Key**: Your API key from [Memorylake Console](https://app.memorylake.ai/panel/token) (starts with `sk-`)
* **API Address**: Model Router service address
### Step 1: Get Your API Key
Copy your API Key from the [API key management page](https://app.memorylake.ai/panel/token) in the Memorylake Console.
### Step 2: Add Provider in Cherry Studio
1. Open Cherry Studio
2. Add a new Provider
3. Select the corresponding Provider Type
4. Enter your API Key and API Address
In the chat settings under system settings in the [Memorylake Console](https://app.memorylake.ai/panel), you can add a quick option to one-click fill Cherry Studio configuration on the [API key management page](https://app.memorylake.ai/panel/token).
### Step 3: Add Models
After configuration, add available models to Cherry Studio. Make sure to check [List Available Models](/features/model-router/list-available-models) to see which models you can use.
### Step 4: Start Using
Return to the chat page and select the configured Model Router model to start a conversation. You can switch between different Model Router models at any time.
## Common Issues
### Cherry Studio
* **Provider Not Working**: Check that the API address and API Key are correct
* **Models Not Available**: Confirm that the models are enabled in your Model Router API key group. Check [List Available Models](/features/model-router/list-available-models)
* **Connection Failed**: Verify your network connection and API endpoint URL
### Claude Code
* **Installation Failed**: Ensure Node.js and npm are installed; using `npm install -g` requires administrator privileges.
* **Connection Failed**: Check if the API address and API Key are correct, and ensure network connection is normal.
* **Environment Variables Not Effective**: Confirm they are correctly written to the configuration file and restart the terminal or execute `source ~/.bashrc` (or `source ~/.zshrc`).
### Codex CLI
* **Installation Failed**: Ensure Node.js and npm are installed; using `npm i -g` requires administrator privileges.
* **Configuration File Not Found**: Manually create `~/.codex` directory and configuration files.
* **Connection Failed**: Check if `base_url` and `OPENAI_API_KEY` are correct, and ensure network connection is normal.
* **Model Unavailable**: Confirm that the model is enabled and configured in your Model Router API key group. Check [List Available Models](/features/model-router/list-available-models).
## Important Notes
1. **Model Availability**: Model availability depends on your Model Router API key group configuration. Always check [List Available Models](/features/model-router/list-available-models) first.
2. **API Key Security**: Never share your API key publicly or commit it to version control. Use environment variables or secure configuration files.
3. **Quota Management**: Monitor your usage in the [console](https://app.memorylake.ai/panel). See [View Usage and Billing](/features/model-router/view-usage-and-billing) for details.
## Related Documentation
* [Create API Key](/features/model-router/getting-started/create-api-key)
* [List Available Models](/features/model-router/list-available-models)
* [View Usage and Billing](/features/model-router/view-usage-and-billing)
* [Error Handling](/features/model-router/others/error-handling)
* [Limits and Prerequisites](/features/model-router/others/limits-and-prerequisites)
## Configuration File Details
### Codex CLI config.toml
* **model**: Specify the model name to use (must be available to your API key)
* **model\_provider**: Model provider identifier (use `memorylake` to represent Model Router)
* **preferred\_auth\_method**: Authentication method (use `apikey`)
* **base\_url**: Model Router API address, must include `/v1` path
### Codex CLI auth.json
* **OPENAI\_API\_KEY**: API Key obtained from the [Memorylake Console](https://app.memorylake.ai/panel/token)
### Custom Configuration Path
To use a custom configuration path, set the `CODEX_HOME` environment variable:
```bash theme={null}
export CODEX_HOME=/path/to/your/config
```
## Cherry Studio Integration
### What You Need
* **Provider Type**: Select a type supported by Model Router
* **API Key**: Your API key from [Memorylake Console](https://app.memorylake.ai/panel/token) (starts with `sk-`)
* **API Address**: Model Router service address
### Step 1: Get Your API Key
Copy your API Key from the [API key management page](https://app.memorylake.ai/panel/token) in the Memorylake Console.
### Step 2: Add Provider in Cherry Studio
1. Open Cherry Studio
2. Add a new Provider
3. Select the corresponding Provider Type
4. Enter your API Key and API Address
In the chat settings under system settings in the [Memorylake Console](https://app.memorylake.ai/panel), you can add a quick option to one-click fill Cherry Studio configuration on the [API key management page](https://app.memorylake.ai/panel/token).
### Step 3: Add Models
After configuration, add available models to Cherry Studio. Make sure to check [List Available Models](/features/model-router/list-available-models) to see which models you can use.
### Step 4: Start Using
Return to the chat page and select the configured Model Router model to start a conversation. You can switch between different Model Router models at any time.
## Common Issues
### Cherry Studio
* **Provider Not Working**: Check that the API address and API Key are correct
* **Models Not Available**: Confirm that the models are enabled in your Model Router API key group. Check [List Available Models](/features/model-router/list-available-models)
* **Connection Failed**: Verify your network connection and API endpoint URL
### Claude Code
* **Installation Failed**: Ensure Node.js and npm are installed; using `npm install -g` requires administrator privileges.
* **Connection Failed**: Check if the API address and API Key are correct, and ensure network connection is normal.
* **Environment Variables Not Effective**: Confirm they are correctly written to the configuration file and restart the terminal or execute `source ~/.bashrc` (or `source ~/.zshrc`).
### Codex CLI
* **Installation Failed**: Ensure Node.js and npm are installed; using `npm i -g` requires administrator privileges.
* **Configuration File Not Found**: Manually create `~/.codex` directory and configuration files.
* **Connection Failed**: Check if `base_url` and `OPENAI_API_KEY` are correct, and ensure network connection is normal.
* **Model Unavailable**: Confirm that the model is enabled and configured in your Model Router API key group. Check [List Available Models](/features/model-router/list-available-models).
## Important Notes
1. **Model Availability**: Model availability depends on your Model Router API key group configuration. Always check [List Available Models](/features/model-router/list-available-models) first.
2. **API Key Security**: Never share your API key publicly or commit it to version control. Use environment variables or secure configuration files.
3. **Quota Management**: Monitor your usage in the [console](https://app.memorylake.ai/panel). See [View Usage and Billing](/features/model-router/view-usage-and-billing) for details.
## Related Documentation
* [Create API Key](/features/model-router/getting-started/create-api-key)
* [List Available Models](/features/model-router/list-available-models)
* [View Usage and Billing](/features/model-router/view-usage-and-billing)
* [Error Handling](/features/model-router/others/error-handling)
* [Limits and Prerequisites](/features/model-router/others/limits-and-prerequisites)